Thursday, July 23, 2015

Crayon Cubes


Word of the day: CUBOID


Look it up.


Apparently I have been offering my guests ice cuboids all these years.

Time to make it right with my new ice CUBE tray. You know, one that actually makes CUBES!
Hun has been wrestling with the stiff cuboid trays in our freezer and struggling to squeeze the cuboids into the small mouths of our water bottles.

I set one tray in the freezer for her to use when in need of a cold beverage. The silicone makes the ice easy to remove for  her and keeps me from slipping over rogue cuboids on the kitchen floor.

But we don't have a ton of freezer space, and the Kuuk ice CUBE trays come in a pack of two. So what do with the other tray? 

Boo suggested we freeze square ice buttons for our next snow person but that isn't exactly needed tomorrow. ..

So we decided to make CUBE crayons.

Hun had never molded her own crayons before so I let her lead this project.

First she found the smallest crayon pieces and piled them into the empty cube molds. I  bit my tongue when she chose not to put as many crayons in there as you would need for a full cube once melted and decided to be okay with what I knew would be square crayons.

We waited several days for a scorcher. I wanted the sun to melt these crayons to increase the green score of the activity but the sun wouldn't cooperate so I ended up coaching the kids through the toaster oven method. We started at 400 degrees but turned down to 350 after the oven started to smoke.

Once melted Hun choose to carefully stir each square of melted crayon with a toothpick.
We let the tray cool then I threw it in the freezer to firm the crayons up.

The crayons popped right out after a short (ten minutes? ) stay in the freezer.

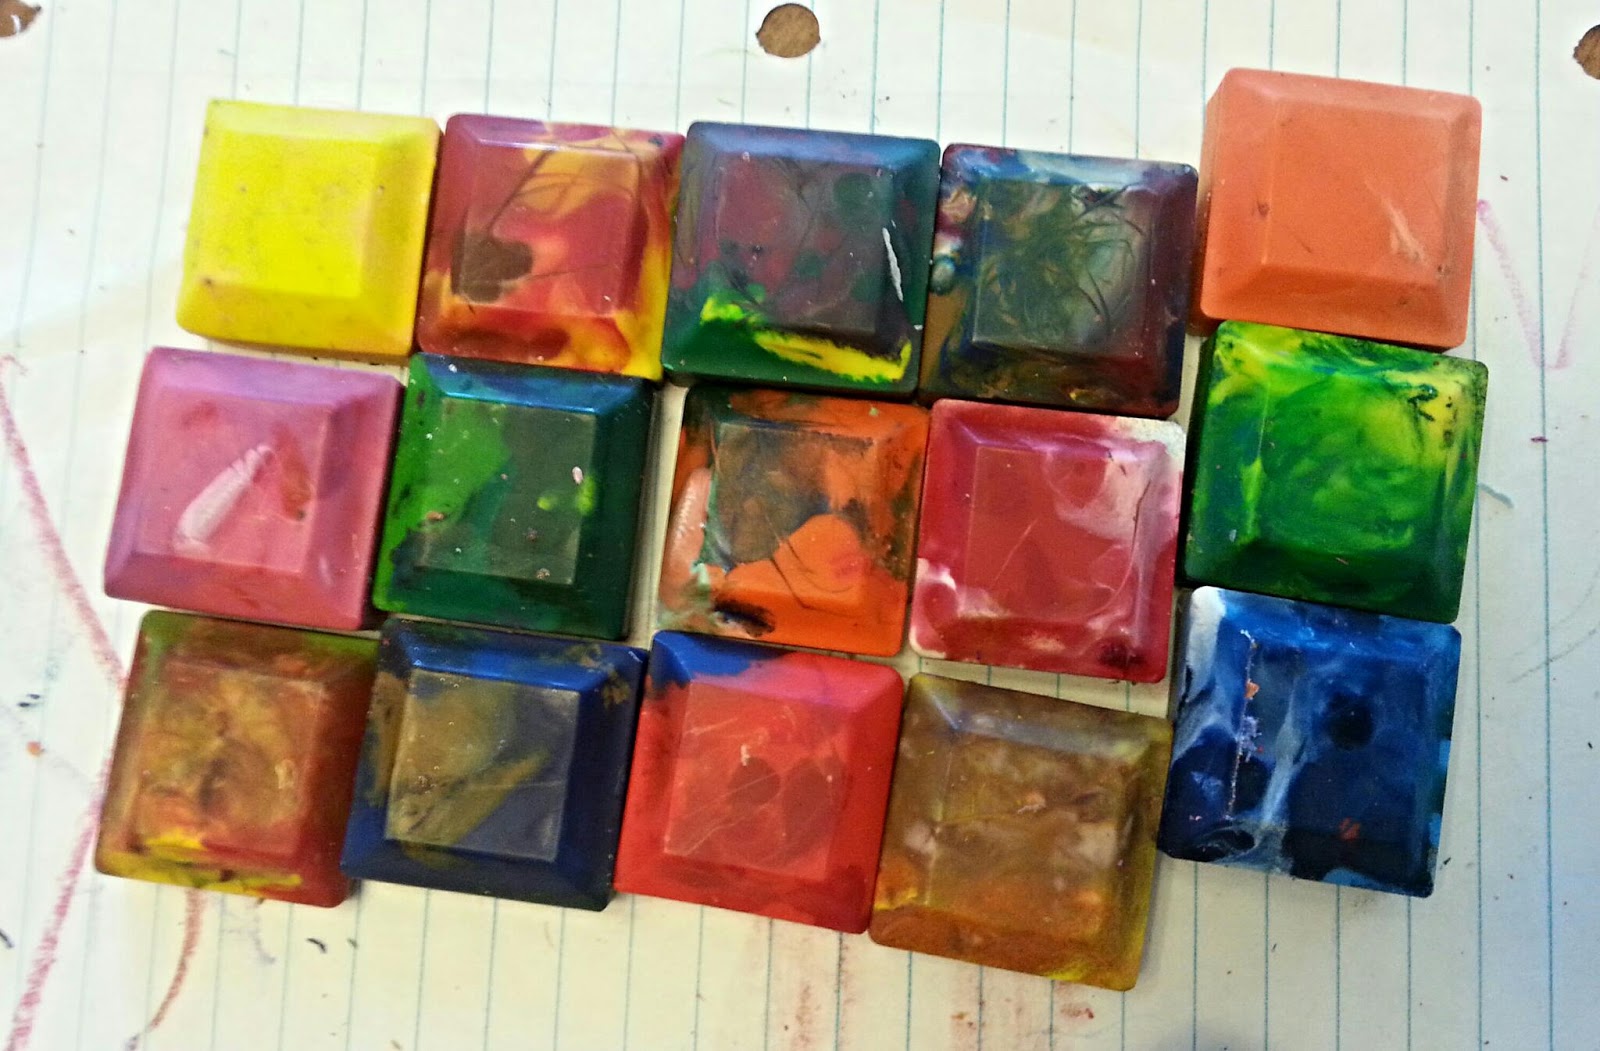
The kids love learning how to manipulate the new shapes and we saved another small pile  (The crayon  stubs) from ending in the landfill.

Mission accomplished!


**I received this product for free in exchange for my unbiased review ***

Saturday, July 11, 2015

Bananarama

What do you do when you have a pile of over ripe bananas and your freezer is full of frozen spinach, diced onions and ice cream?

Banana bread!

Always eager to try a new recipe and never able to locate the one I used the last time  I decided to use this recipe as my fridge has been overflowing with almond flour.

Easy to make and gluten free (contains oats so consider your level of sensitivity and perhaps opt for gluten free specified oats.

I quadrupled the recipe to share at a play group where they gobbled them down. My family and all we have entertained this post week have been gobbling them down.

Of course, the flexipist in me had to change up a bunch of the ingredients. A friend insisted I try to remember for her,  so here goes:

3 medium ripe bananas
1/2 tsp pure vanilla extract
1 egg
3 Tbsp grape seed or coconut oil, melted (ain't nobody got time to melt coconut oil! I mashed it in with a potato masher! sub'd applesauce for a good third of this)
1/4 cup organic cane sugar
1/4 cup packed brown sugar (low on sweetener I used root beer syrup, my use for flat root beer: I boil it down to reduce waste)
2-3 Tbsp honey, depending on ripeness of bananas (I skipped this)
3.5 tsp baking powder
3/4 tsp sea salt
1/2 tsp ground cinnamon
3/4 cup almond or dairy milk (used the cow)
1 1/4 cup almond meal (about a quarter of this I used coconut flour for )
1 1/4 cup gluten free flour blend (A combo of America Test Kitchen diy gf mix, coconut flour - puh-leeze buy  in the Indian section of your grocery store to save, brown rice flour bought bulk on Amazon, and tapioca flour - again don't forget to check the Asian Foods aisle at your grocery for cheap tapioca starch)
1 1/4 cup gluten free oats (I can handle regular and had some oat baby cereal I also sub'd for some of  this?

My recommendation to my friend Barbara? Stick to the regular recipe, mine is a mess to follow, though the ground coconut was a good addition and you can sub some of the oatmeal with the ground type.

Thursday, July 9, 2015

The $13 solution for stopping your toddler's pinching ;)

Today, after Boo's soccer practice, Moo had become Pretty emotionally disregulated. She was tired, bedtime was going to be late, and she is working on eliminating her nap (sob! )

We bought a Prius when our family expanded last month and, though much roomier than the Aveo we had touted the two children in, it still isn't what you would call spacious for three kids in the backseat. 

So it made sense that Hun was concerned about having to sit in the back seat right up next to Moody Moo.

When Moo is moody she is known to turn her hands into little weapons, flailing about to hit, scratch and pinch. Telling her to stop is a useless feat, instead she needs to be told what TO do. 

Happily cradeling the Zenit shaker
Today this problem was solved with a Zenit Audio Wood Egg Shaker. Instead of saying, "Don't pinch your sister! " I was able to positively engage her with reminders to "shake that egg! "
Shaking her egg containing fist at the birds. (AKA: NOT pinching!)

She loves the shaker! 
The perfect size, it fits right into her fist. 

A fan of all things musical (batteries don't count! ) this is a great starter instrument that teaches kids how to keep a beat without wreaking havoc on their parents' ears. 

I love that this version is made of wood, making it a more environmentally friendly option than the plastic type I have purchased for gift giving historically. 

The wood is a solid birch,  and withstood even Moo's teeth, something the lightweight reed covered shaker egg we already had at home certainly couldn't do.

Shake on!

Moo, self occupied while refusing bed time on a day she napped!
***I received this product for free in exchange for my unbiased review***

Wednesday, July 1, 2015

How to Breathe New Life into Old Furniture in less than five minutes


As our family numbers have increased, our furniture needs have too.

Luckily we have some pretty supportive friends and family who have passed on their extras to us so that we didn't end up breaking the bank.

I fell in love with this dresser hand me down as soon as my husband brought it home.

The night was a busy one and I told him to just set it in the kitchen as I was dealing with our Energizer Bunny children and The Ogre had a meeting to run off to. 

He set it against the kitchen wall and by the next morning I was convinced that was exactly where it should stay.

The top drawer became the home for my purse and work-from-home paperwork, the middle drawer was packed with the various coloring books and art supplies that get spread across the table each day, and the bottom drawer awaits its purpose. 

The inside getting filled, I decided to focus my attention on the outside of the old dresser. 

My mom had a great idea of painting just the top in some sort of faux granite to match the kitchen. Much as I love this idea I really cannot dedicate that kind of time to this piece of furniture at the moment.

So what did I do with the few minutes I could spare?


I polished and conditioned with Furniture After Life!

Furniture After Life didn't smell harsh and really had little smell at all. I used an old cloth diaper to spread the oily polish along the grain of the wood, paying attention to the corners and crevices.

Then I flipped the cloth over and went over the grain again picking up any excess oil.


The drawers stuck a bit and were hard to pull in and out. To smooth this process I used my friend Teresa's tip to rub soap along the parts of the drawer that were rubbing on the edges. 

Now look at my dresser! 

Certainly loved but now with a glow!

**I received product for free in exchange for this blog post**